Glow LED with Push Button in IoT: Complete Code

Write a program to interface a push button and an LED so that the LED glows when the button is pressed.
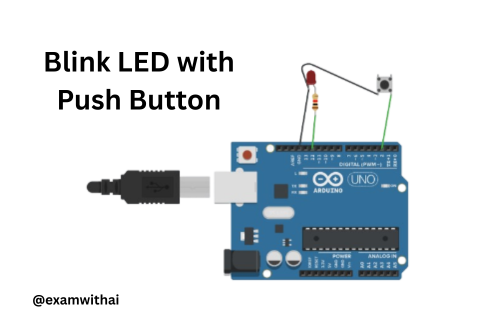
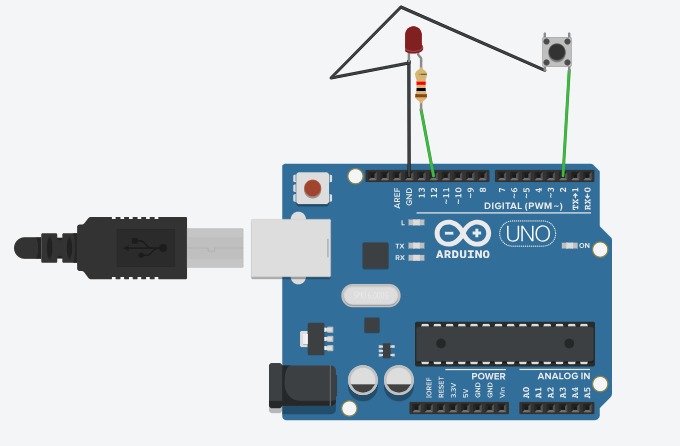
Glow LED with Push Button in IoT: This program turns ON an LED when a push button is pressed. The button is connected to digital pin 2, and the LED is connected to digital pin 12. The button uses an internal pull-up resistor, which means the logic is reversed—when the button is pressed, the input reads LOW.
void setup()
This function runs once when the Arduino is powered on or reset. It’s used to set up the pins and other configurations.
pinMode(12, OUTPUT);
- This sets digital pin 12 as an OUTPUT.
- Pin 12 is where the LED is connected.
- The Arduino can send HIGH or LOW voltage to this pin to turn the LED ON or OFF.
pinMode(2, INPUT_PULLUP);
- This sets digital pin 2 as an INPUT with an internal pull-up resistor.
- It’s connected to the push button.
- The internal pull-up resistor keeps the pin HIGH (logic 1) by default.
- When the button is pressed, the pin is connected to GND, making it LOW (logic 0).
- void loop()
- This function runs repeatedly forever. It’s where the main logic is executed.
int state = digitalRead(2);- Reads the current digital state (HIGH or LOW) of pin 2 (button pin).
- Stores it in the variable
state.
if(state == LOW){
    digitalWrite(12, HIGH);
}
- If
stateis LOW, this means the button is pressed. - The LED (connected to pin 12) is turned ON by writing HIGH to pin 12.
else{
    digitalWrite(12, LOW);
}
- If the button is not pressed (state is HIGH),
- The LED is turned OFF by writing LOW to pin 12.
CODE
// C++ code
//
void setup()
{
  pinMode(12, OUTPUT);
  pinMode(2, INPUT_PULLUP);
}
void loop()
{
  int state=digitalRead(2);
  if(state==LOW){
    digitalWrite(12,HIGH);
  }else{
    digitalWrite(12,LOW);
  }
}
OUTPUT


